I found the secret to the perfect scones
These simple tips from our Taste Test Kitchen experts have improved my scones (and life) for good. The first tip is a total game-changer.

Scone baking failures
To cut a long and rather embarrassing story short: the scent of burning scones (resembling smoke signals) was soon emerging from my cooking station – and it became apparent that I’d put the scones under the grill instead of baking them. Needless to say, I would not be receiving top marks in that subject and would not be eating the results.
It’s been quite a journey toward becoming a Recipes Editor here at Taste, believe me.
How to improve your scones
I’d like to think I’ve come a long way since that fateful day in high school. Not only have I shed my colourful braces, Silverchair obsession, and desire to become a marine biologist, I’ve now had many successful attempts at baking scones in the nearly-25 years since.

And yet, it’s come to my attention (far too recently) that I’ve still been making some rookie errors that have rendered my scones less than perfect.
Because scones are a celebration of simplicity (they contain so few ingredients and require only a few steps), their success lies in observing your techniques.
Enter our very own culinary Charlie’s Angels: Michelle Southan, Elisa Pietrantonio and Amira Georgy, alongside Matt Preston and Recipe Tester Alison Adams – who’ve bestowed me with their wisdom and levelled up my scone-baking practice.
Now, instead of plumes of smoke, my kitchen is filled with the scent of freshly baked scones with beautiful rise, golden tops and that much-wanted fluffy interior texture.
Top tricks I learnt from the experts for baking perfect scones:
1. Resist the twist
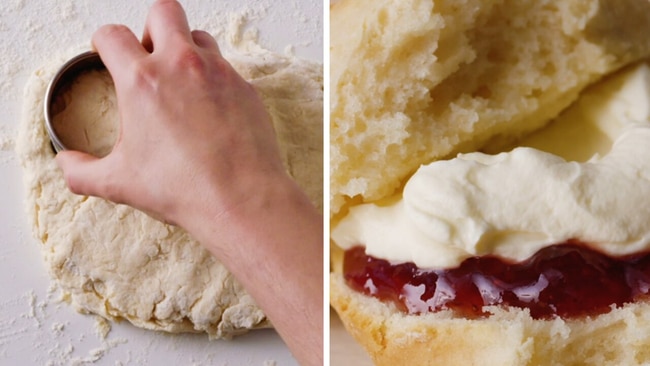
Twist and shout? Not in my kitchen. Elisa tells me it’s really important not to twist the cutter when you’re cutting your scones into shape, as it can prevent them from rising evenly and forming their signature easy-to-halve shape. This tip has been the biggest game-changer for me.
2. Use frozen butter
Many of you eager bakers will already know that using super cold, chilled butter means a much better resulting scone texture, (cold butter prevents the butter from melting before the scones are baked, and will help you achieve a lighter crumb), But, Elisa suggests you can even use frozen butter, grated into your flour. This is particularly useful for me, because I live in the sub-tropical Sunshine State where butter has a tendency to melt like ice-cream on a balmy day.
3. Don’t overwork the dough
You may already know this one, but it’s incredibly important to avoid overworking your dough. Some recipes recommend using a food processor, but Recipe Tester Alison Adams says this is too much, and doing so will result in a chewy scone. Our experts recommend using a flat-bladed knife to make a cutting movement to bring the dough together (or a pastry scraper, if you have one). The mixture is adequately mixed when it’s crumbly with a bit of residual flour at the bottom of the bowl.
You can then use the scraper or knife to transfer the mixture to a board and pat the scones into a round. Then, remember to resist that temptation to twist your sconces with the cutter. (If you don’t have a cutter you can use the bottom of a cup, but still resist the urge to twist). We want those sides to be straight to get a good rise. The mixture, according to Matt Preston, should be somewhere between a wet cake batter and a dough.

4. Freeze the dough
Alison says that by freezing the dough before baking, your butter will stay solid, creating little air pockets in the scones once cooked. This gives them a super soft and airy texture when the scones rise.
Elisa said: “I never do this myself (purely out of laziness and the fact I want to eat my scones ASAP!) but if you’re more patient than I am you can chill the scones once they’re cut. This helps relax the gluten and hardens the butter which gives you a tender flakier scone (so similar to how you’d make pastry).”
5. Create rise and shine
Unlike when you’re baking biscuits, when you’re baking scones it’s a good idea to place the scones close together – this encourages them to rise upwards, rather than outwards. As for that shine, Michelle says, “If you want a matt finish on top, milk is the best (and most traditional) wash. Some people like a glossy top and they can use an egg wash, or even a little cream to achieve that.”

6. Follow our best basic scones recipe
Of all the scone recipes I’ve tried, this scone recipe is my favourite. It’s simple and works out every time. If you prefer a lighter golden hue, you can keep an eye on your scones from the 15-minute mark and see if they’re cooked to your preference yet. I find that 20 minutes in the oven cooks my scones to perfection (by which I mean fluffy interiors and a golden top). Our community also loves this lemonade scone recipe, which comes together in just 3 ingredients.
7. Reduce the juice
If you’re adding fruit to make fruit scones, Amira suggests you don’t use super juicy fruits as the liquid in the fruit will weigh the scones down. “Dried fruits (chopped, if large) are best. And, if using frozen berries, don’t thaw them first.”
8. Fresh is best
Alison says, “When it comes to your self-raising flour, as only one of three ingredients, make sure your flour is super fresh. This may sound odd, but the baking powder, which is the rising agent, can expire and your scones will remain disappointingly flat.

Originally published as I found the secret to the perfect scones


