
‘Glowing and fearless’: Top DIY trends for 2022
The pandemic has turned DIY professional: macramé, ‘glowing’ furniture, clever bathroom tweaks and vignettes are just some of what you should be into, if you’re serious in 2022.

Lifestyle
Don't miss out on the headlines from Lifestyle. Followed categories will be added to My News.
Forget tradies. It’s time to roll up your sleeves and do it yourself.
These are our 22 must-do DIYs in 2022, to keep your home humming.
1. Preserve dried flowers in resin
Whether they are your favourite flowers or flowers tied to an important event like your wedding bouquet or birthday, preserving them in resin will capture their beauty forever. If there is moisture, the resin might not cure properly, and the flowers will rot over time inside the resin, so step one is to make sure your flowers are completely dry before putting them into a resin mixture.

Dried flowers can be coated with white craft glue or even hairspray, or sandwiched inside clear packing tape or a laminating pouch. Once flowers are placed into the resin, let them set, then pour a bit more resin over them and make sure they are completely covered. Allow 24 hours to dry, and ta-da, you have your own personalised work of art.
2. Sand and paint the front door
Can’t afford to move but feel the need to change up your home? Paint your front door. It’s a step to creating a feel-good change. Exposure to the sun, wind and rain leaves your front door dirty, so before you bring out the paint can, take a few minutes to wipe it down.
Also, put down drop sheets or cardboard to catch any paint drips, and if you don’t want to remove door furniture, cover all hardware and glass with masking tape to ensure you do not accidentally paint them.
You can even mask over the hinges so they remain nice and bright.

Next, sand the door with sandpaper to smooth off any bumps, creating a surface the new paint can grip onto. Be sure to wipe away the dust from sanding before painting and you’re ready to go. Choose a colour that really pops and use a small roller to paint main areas of the door, spreading paint evenly so there are no thick areas.
3. Panelling walls
No matter what the space, panelling always seems to uplift a room, adding that touch of luxury at the same time as character. Even if you don’t know your way around a circular saw, Surround By Laminex is a new brand of easy to install wall panelling solution. The panels are available in eight different profiles including the enduring Classic VJ style and the panels are 2400x3000mm varying from 9mm to 12mm thick. There is also the Scallop 45, which is a scalloped design with a uniquely rounded curved feature. It is so simple and easy to do, yet incredibly effective, completely transforming rooms and giving them that extra finished look.
4. Macramé art
Can I teach myself macramé? The answer is a resounding yes. Macramé is one of the easiest crafts to learn and most macramé projects you see on Instagram and Pinterest are created with just three basic knots. It’s the perfect style accompaniment to Hamptons, contemporary and beach chic and makes for an inexpensive work of art with wow-factor.

A versatile form of fibre art, macramé can be used to make everything from wall hangings to plant hangers using simple materials like cotton twine, jute, hemp, or yarn. It can be as simple or complex as you would like. Embellishments like glass beads, as well as dyed threads, can also open up a range of creative possibilities.
5. Create a mud room
The school year will be back before you know it, so get organised and make use of a dead space by turning it into a mud room zone to keep kids’ stuff. The best place to locate a mud room is somewhere that leads to the front door or garage, so look for a space along a hallway, a corner near the kitchen or even a section of the laundry. A space from one metre wide will suffice, but the bigger the better, and essentials to include are wall hooks, storage compartments and somewhere to sit down.
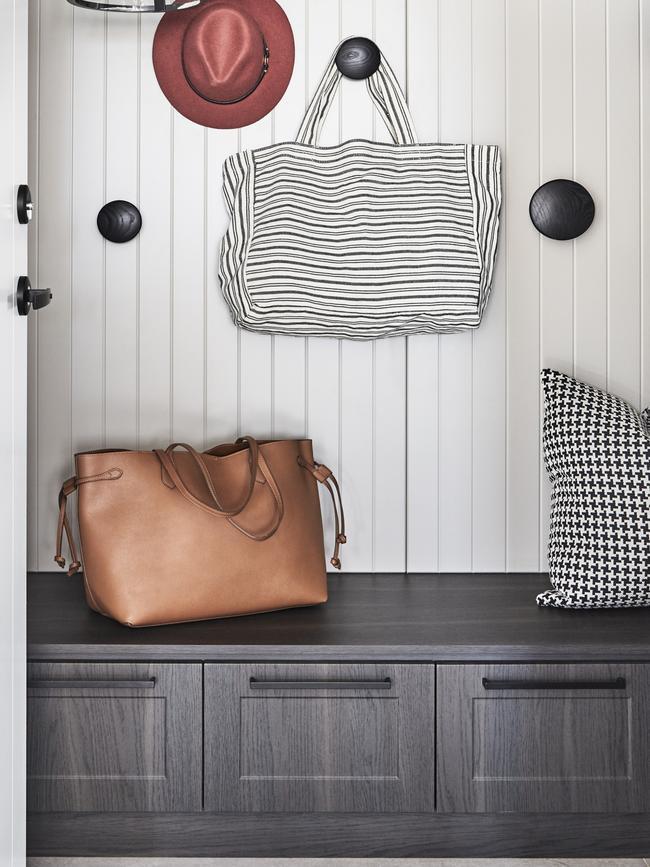
While you can install built-in cupboards for a streamlined look, the upcycled approach can look just as good. A freestanding bench seat or an old piece of furniture, such as an TV unit can be repurposed as somewhere to sit down. Just add a benchseat cushion, baskets underneath a bench for shoes and bags.
6. Hang a gate
First, choose a gate (timber and metal pre-made kits can be found at hardware stores).
Measure the width of the gap and work out the gate position. Pedestrian gates can be 900mm to 1.2m, while driveway gates are usually around 1.5m wide each. Anything wider can be too hard to swing open or needs extra stability.
You’ll need two fence posts, quickset concrete, dynabolts and screws, three hinges, a latch and a gate kit. You’ll also need tools including a post hole digger, shovel, drill, spirit level and clamps. Dig the post holes (at least 600ml deep), mix the concrete as per instructions and add posts, clamping in place. Leave the concrete to set. Bolt the posts to the wall and fence, then measure the distance between the posts left for the gate. Assemble the gate kit to fit your space, allowing for a small gap to swing the gate off hinges. Add hinges (top, middle and bottom) to one post and also to the gate. Add a latch and you’re done.
7. Install a cat run for your fearless feline
If you have a side of your home that isn’t used much or not at all, this is ideal for an outdoor cat run, but so too is under the alfresco if you have a social cat.
DIY netting kits are widely available, and ideal if you have a space between the house and tall fences where you can securely install the netting overhead, so kitty can roam free below it, and you can too, but can’t get out.

Cat netting can be bought for $4-to- $8 per sqm, with options from 19mm UV stable netting to reinforced stainless steel options, so if you’re got a cat that likes to chew, choose the sturdier option. Netting can be secured in place with wire rope systems along fence lines, brick walls and house eaves.
8 Create a vignette
This is just a fancy way of having a place for all of your favourite knick knacks. You group them together, curated into a semi-organised space. A coffee table, sideboard, a corner of the room or even a shelf will do to collate items such as art, pictures, ceramics, bowls and curios. And as you do so, make a clean sweep of the rest of the room with a quick tidy up too.
9 Install a window
You may need a builder to help if the wall is load bearing and needs a support beam or lintel and a glazer to actually install the glass. But, the fun bit is in between, such as smashing the wall or knocking out the bricks and that can be done by you as long as you’re sensible.
This means wearing safety goggles and covering up. A hard hat is a good idea and make sure you watch a few how-to videos before you start. The end result will be more light in your home and a better connection to the outdoors.

10 Skate board table
There’s an instant hit of stylish, quirky coolness to be had from a piece of furniture that clearly used to be something else in a previous life. Whether it’s a side table made from a vintage suitcase or in this case, a table made from an old skateboard and hairpin legs. Anyone with a board-mad kid will tell you that you go through a few. They don’t always get smashed in half, but sometimes landing a Kickflip or Ollie will create a crack that sends the board to the skateboard graveyard. With a set of medium hairpin legs that board can be a side table for the kids room. It’s a really easy table to make, just be careful not to split the wood when attaching the legs with screws, or to have the screw heads poking through. You’ll need 16 button screws that are either 12mm or 15mm long to attach the hairpin legs to the underside of the board. Use a hand screwdriver rather than an electric one and ease the screws in gently.
And don’t sand or polish the board before creating the piece – the more grungy and scratched the board, the better.

11 Pallet bar
You’re not a proper DIY-er until you’ve had a crack at making something out of pallets – and the pallet bar is a really fun project to pop your cherry. The materials list is small – two pallets and a 50 pack of 65mm timber screws. Although if you want to add a slightly more sleek finish, then throw in an additional piece of dressed timber for the bar top, and some gloss varnish. Take one of the pallets and strip off the slats on the underside, so that you’re left with just the top slats. Next cut all the way through those slates, from top to bottom along the edge of the central support.

Do it either side of that central support. You’ll be left with two identical halves of the pallet that can now be screwed into either side of your other pallet. You should now have the u-shape makings of a bar. If the underside pallet slats you stripped off are too mangled to be re-used as the bar top, then a 1.2m piece of dressed pine will do a classier job anyway. Varnish with some cheap ultra gloss and a 50mm paint brush, and then decorate with currency notes from around the world, gaudy tankards from Vinnies and a dodgy handpainted ‘Bar’ sign.
12 Create a crate table
An industrial crate is the ideal building block, but can work well with a drawer if you’re throwing out an old chest of drawers. It has to be timber rather than laminated, though. On the outside, leave the crate as it is, don’t even varnish. At a push, you may want to paint it with one coat of white paint and then sand that back to give a shabby chic look. Inside the crate or drawer, you can really go to town with your artistic imagination.
A square of retro wallpaper looks good pasted to the bottom inside, or for a strong typographical look, tear some pages from old books. If there are graphs or diagrams, that can be fun. For the base, you can use legs, but it looks so good with caster wheels for an industrial finish. A pack of four caster wheels can be as little as 12 bucks. Attach them with button screws to the base of the cabinet, being careful not to pierce or split the wood. Add an angle-poise lamp on top, an LED light jar inside, and anything else you fancy.
13. Give furniture a glow up
Worn out furniture or even solid pieces that no longer appeal can be transformed with just a lick of paint. This is a project best done outside with a drop cloth underneath. Start by giving your piece a wipe with a microfibre cloth. Next, do a light sand with sandpaper. Remove dust with a cloth.

Undercoat will help paint adhere and last longer too. Add a coat and leave to dry. Choose a colour. You’ll want to apply two to three coats depending on how deep you want your colour to be. Wait for each coat to dry before adding another. Try paint designed for furniture such as the range by Annie Sloan, which also offers a wax coat to provide protection.
14. Paint your bathroom tiles
Tired of your bathroom but not ready for a total redo? Give it a fresh new look with a coat of tile paint.
Before you get started, give your bathroom a serious clean including grout lines. Once tiles are clean, give them a light sand so that primer and paint will go on smoothly and stay that way too.
When finished wipe away all dust. repeat the entire process. Yes. It will mean your paint job looks more professional and lasts longer too.
Apply masking tape to any areas you don’t want paint to touch and apply a primer. Cut in around the edges and paint grout lines with a large brush. Use a roller for the rest. Leave to dry fully. This might take a while – wait four hours to be on the safe side. Paint (brush and roller routine again), let dry for eight hours, paint again. And voila. New bathroom.

15. Make an emergency kit
Here’s a guide on what to have in the case of a natural disaster or emergency such as a large storm event or flooding. All items need to be stored in a water tight container and be accessible if required. Check your local authorities’ recommendations as each state may vary.
● First aid kit: A must have. This can save lives so make sure it is up to date.
● Important documents: Store items such as your passport, drivers license and insurance documents on a USB stick in a zip locked bag. This will take up less room than a paper copy and will not get wet.
● Gloves: In the case of a flood or storm there will be debris and rubbish. A couple of sturdy pairs of gloves will help protect from cuts and infections.
● Tissues: Enough for each household member.
● Torch: If electricity has been cut, don’t be left in the dark.
● Batteries: You will need enough batteries for three days. Ensure you have the correct sizes for your torches and radio.
● Toiletries: Toilet paper, toothbrushes, toothpaste, soap, shampoo, personal hygiene products, sunscreen and insect repellent.

● Water: Store enough water for each member of the household. 10L per person should get you through three days.
● Food: Non-perishable or tinned items are best. Make a three-day meal plan. If tins are not ring pull, you will need a can opener in the kit also.
● Phone: This is vital. Have a spare phone charger or fully-charged portable battery pack in your emergency kit.
● Radio: A battery operated radio is a reliable way to stay up to date with what’s happening out there in the world and will keep you entertained too.
16. Refresh your outdoor setting
If your outdoor timber furniture is looking tired, spread some love and make it feel like new. I follow these easy steps below to restore my outdoor furniture.
● Tools
● Scrubbing brush
● Wood cleaning solutions
● Old rags
● Sandpaper and a sanding black
● Outdoor furniture oil or stain
● Drop sheet
● Paint brush
● Personal safety equipment
1. Brush and clean down the furniture to remove all dirt build up and cobwebs.
2. Sand using a fine grit sand paper wrapped around a sanding block small circular motions.
3. After sanding prep the furniture with a wood cleaning solution.
Follow the mixing instructions on the container. Dip an old rag in the solution and rub the furniture down giving it a good scrub.
4. Rinse furniture off with a pressure washer or hose and place in the sun allowing it to dry off.

5. Once dry, it’s time to apply your first coat of oil or stain.
Place furniture on the drop sheet. Dip brush in your oil and follow the grain of the timber completing small sections at a time, helping prevent drips.
6. With your furniture soaking up the oil, give it a wipe down with a clean rag and then leave for 12 hours or so.
7. Apply a second coat repeating steps five and six. This will ensure your furniture and decks will look great for years to come.
As a guide I suggest this needs to be completed at minimum once a year.
17. Plant a succulent garden
First, choose pots you love. Hardware stores and gardening retailers have plenty and you can always paint the if you can’t find a design you love. Ensure your pots are big enough to allow for root growth. Ideally, the diameter of the pot should be equal to that of the plant, including its spines. If the plant is columnar in shape, allow for a pot diameter that is equal to half the height of the plant, say the team behind 1001 Hints and Tips for the Garden (Reader’s Digest).
Once potted organise your succulents in a display that you enjoy. We like a mix of textures, heights and sizes, but you might like to plant in neat rows. Whatever takes your fancy.
Don’t overwater your succulents. Many need little to no water in winter and should be watered only when the potting mix begins to shrink from the sides of the pot. In summer they should be watered well. Do this whenever the top couple of centimetres of compost is completely dried out.
18. Organise your wardrobe
Throwing open the wardrobe doors each morning to be greeted by an orderly array of pieces to slip into is easy to achieve. And once done it will have significant benefits in that it will save you time and also money as you’ll wear what you have. First, empty out your wardrobe.
Rehang any items you consider still suitable. This means pieces that fit, pieces that are flattering, those that you adore and beautifully-made items that will likely make a comeback.
Take the rest to a charity store. It really is that simple. Now, rehang items.

A single set of hangers will make the wardrobe appear neater. We like the wooden versions, but they all work as long as you keep them consistent. Hang items together — pants with pants, skirts with skirts and son and keep all the hanger hooks facing the rear for a concise look. The super keen might like to go further and also colour match items.
19. Build an insect hotel
Insects aren’t fussy as to where they bed down at night so as long as they’re protected from the weather. This means that as long as your structure is watertight, the world is your oyster in terms of shape and form. You might like to build a mini house (such as the one above). The ‘furniture’ is also up to you as different insects prefer different materials. Bees and wasps love holes drilled into wood so that’s always a great option. A rotting log or three will appeal to wood-boring beetles, spiders and centipedes too.
A bundle of twigs and sticks of various sizes is great for various beetles and bamboo canes will appeal to bees. Straw or dried grass is a favourite of lacewings and other insects that dine on pests such as aphids, caterpillars and mites. Great news for gardeners.

20. Clean up your concrete
Grab your pressure hose if you have one. If not, borrow from a friend or hire from a hardware store. Many offer them for weekends at bargain prices.
Sweep the area you plan to clean be it the driveway, side passage or patio. Spray a chemical cleaner (wear gloves and protective glasses).
Connect your water cleaner to the hose, plug in into a power point and away you go. Clean in a gentle sweeping motion or you risk lines and squiggles on your concrete. That said, maybe save a corner where you can ‘write’ a message or sign your name just for fun.
21. Fix a drip
Follow these simple tips and not only will it save on your next water bill, but it will also save on a hefty plumber’s bill.
Step 1: Ensure you have the correct tools ready to go. You’ll need the following: ● Adjustable spanner or shifter ● Flat head screwdriver
● Valve repair kit. This should contain all the washers needed in required sizes and
lubricant. This will be available at your local hardware store.
● An old rag
Step 2: Turn off your water at the mains. This is generally located at the front of your property in an accessible location near your boundary fence.
If in a unit or townhouse it will be located under the laundry, kitchen or bathroom cupboard. Do not forget this step before proceeding.
Step 3: Using a shifter or multi grips tape off the top section or spindle of the offending tap. If the tap is a chrome tap, wrap this with a cloth to help prevent damage to the tap.
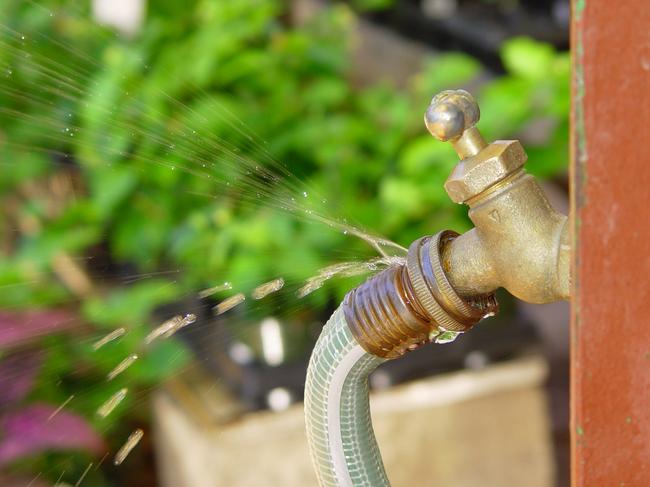
Step 4: You can just replace the jumper valve in the end of the spindle but if you’re going to the trouble of doing this let’s do it right. Replace all the washers and O-rings in the tap using the valve repair kit and lubricant we have at hand.
Step 5: Reassemble the tap in the reverse fashion you removed it, be sure not to over tighten as this will compress the items replaced and you will end up with the same problem.
Step 6: Turn the mains water back on. Please make sure all items have been tightened and are safe to be used again before doing this step.
If the tap is still leaking it may need to be reseated.
This is the process of smoothing out the body of the tap so the washer can get a tight seal. A resealing kit can also be bought from the local hardware store. Follow the instructions on the pack.
Please check with your local plumbing regulations to make sure the works you are doing are not illegal and needing to be completed by a licensed plumber.
22. Lay some lawn
Laying turf is pretty simple. You’ll need 50-to-100mm of topsoil. Work it through with a rake, then a spreader so it’s smooth and even. Add a wetting agent then smooth it in with a spreader. Next up, lawn fertiliser. Now, a solid hosing. Finally, time to lay your turf rolls. Lay each section neatly against the next to avoid air pockets and later, lawn lines. Trim any excess with shears and then, once it’s all fitting neatly, walk over it and smooth out any lumps. Give it another good watering. Do this every day for six weeks.
More Coverage


Originally published as ‘Glowing and fearless’: Top DIY trends for 2022
Trick your partner into pampering with self-care dates
Because there are only so many hours in a day

I took a cruise, and learnt to make the perfect Martini
These cruise lines are raising the bar on the afternoon tipple with these cocktail-making classes, leaving guests shaken and stirred.