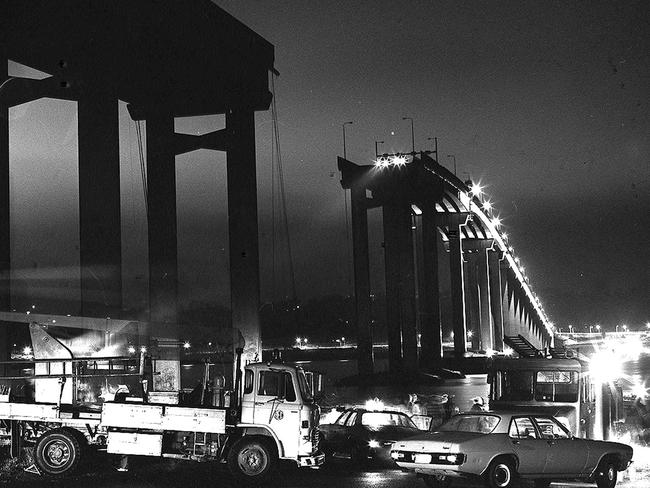
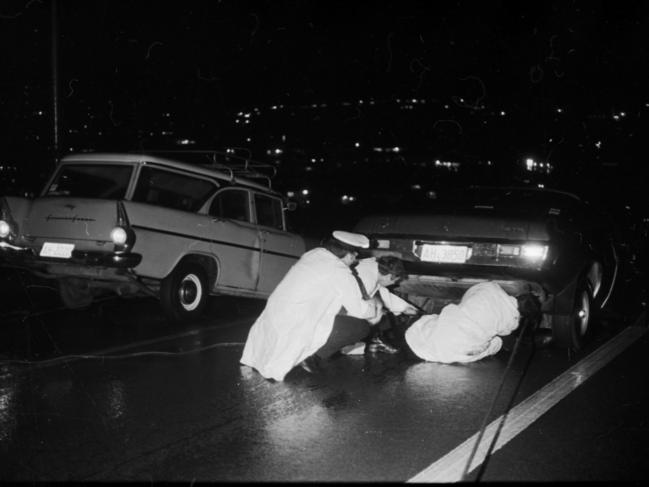
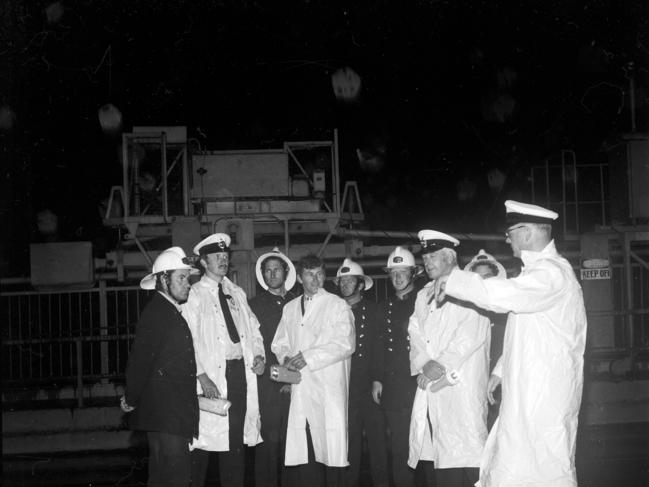
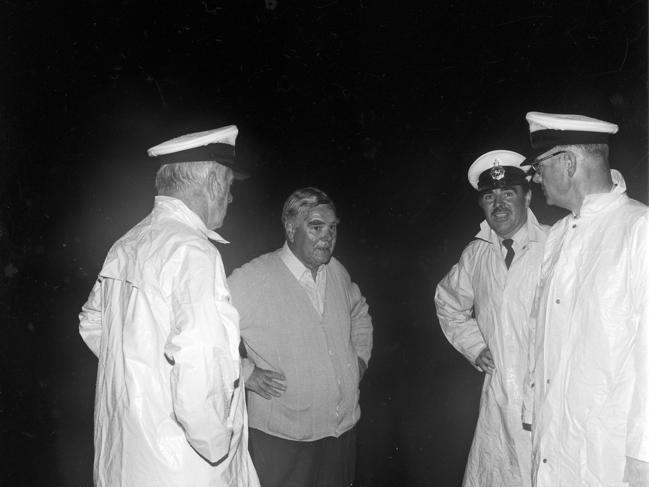
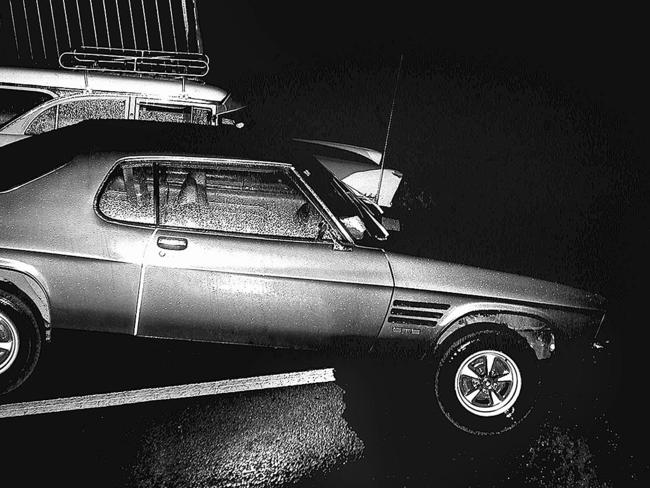
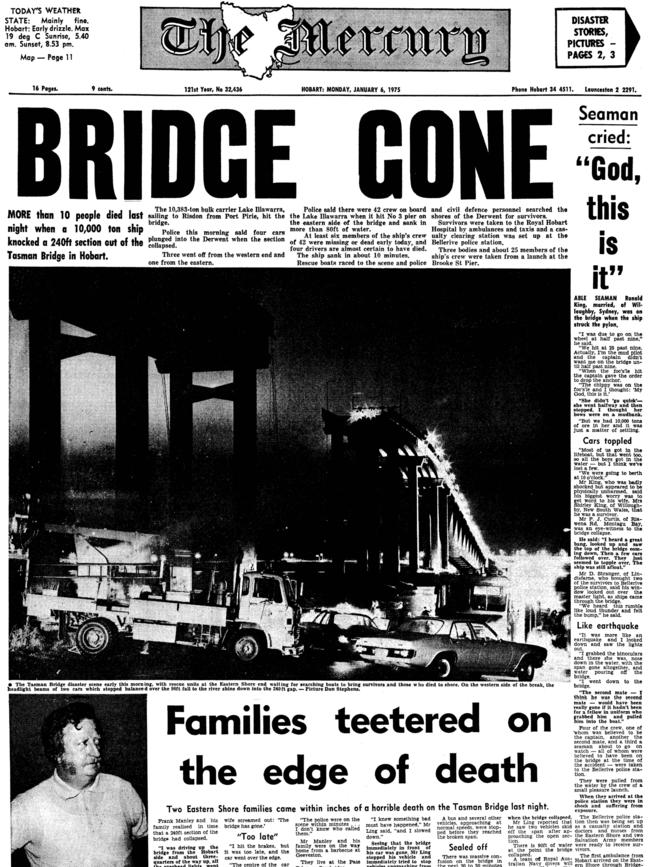
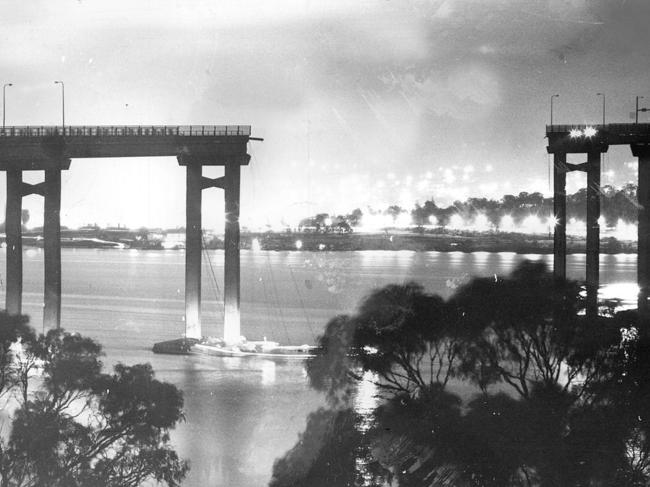
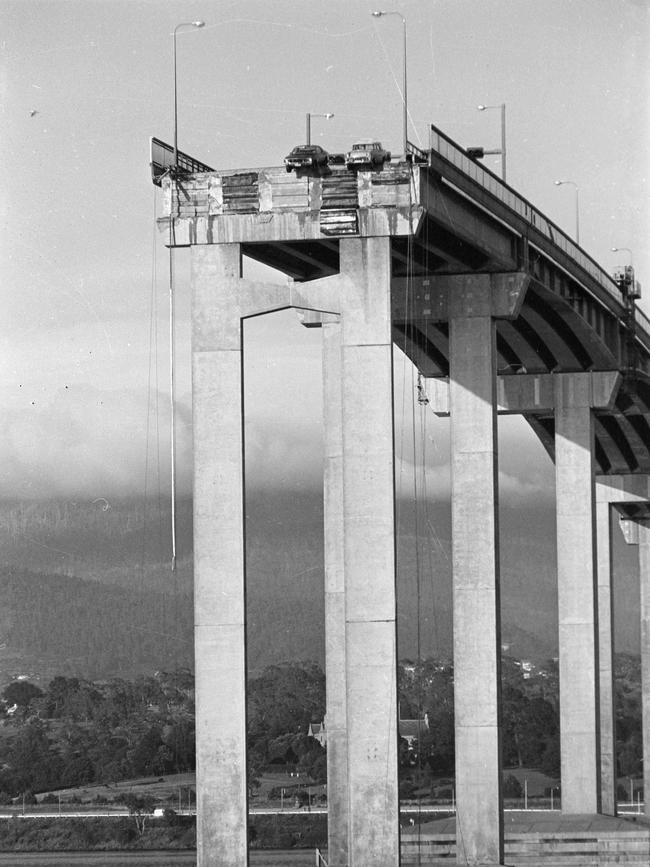
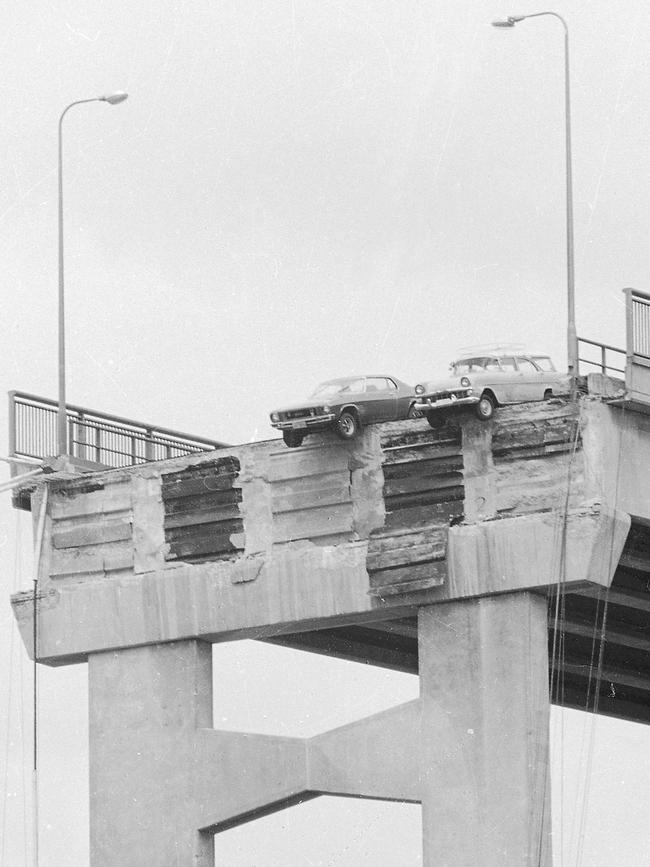
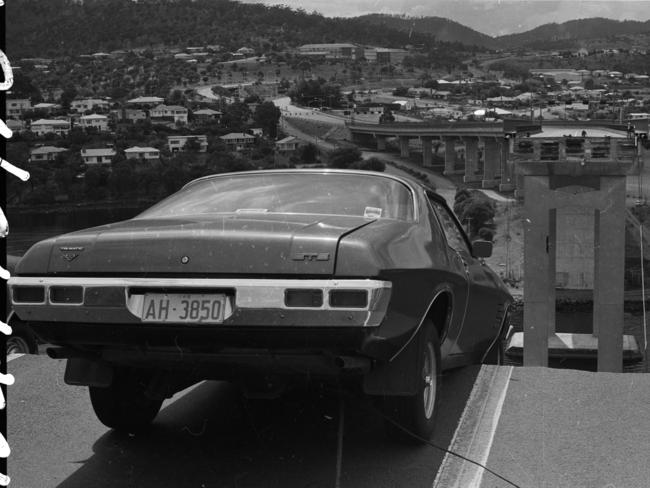
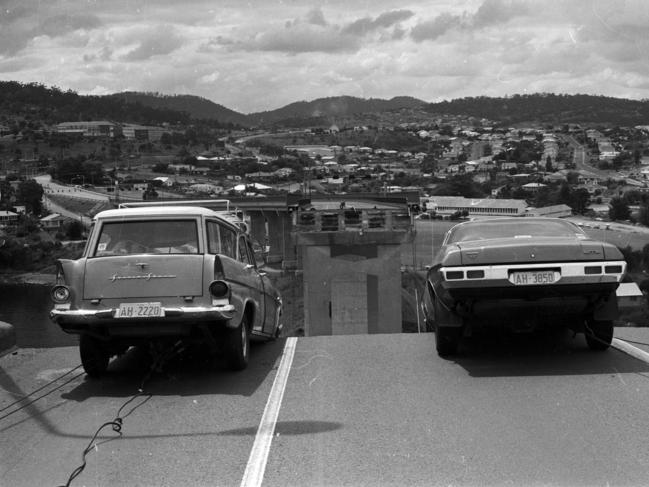
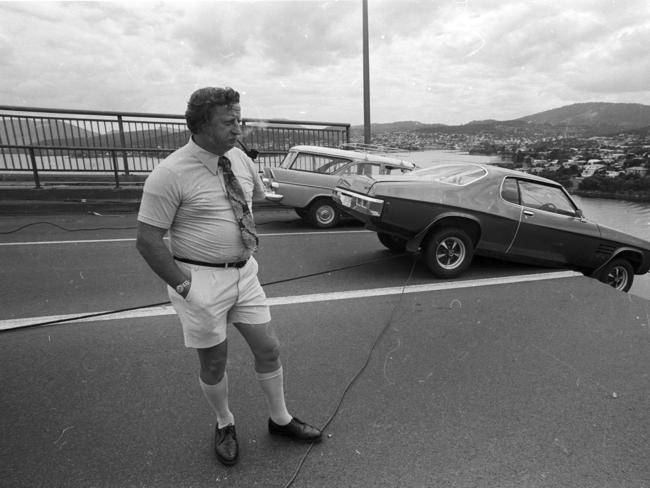
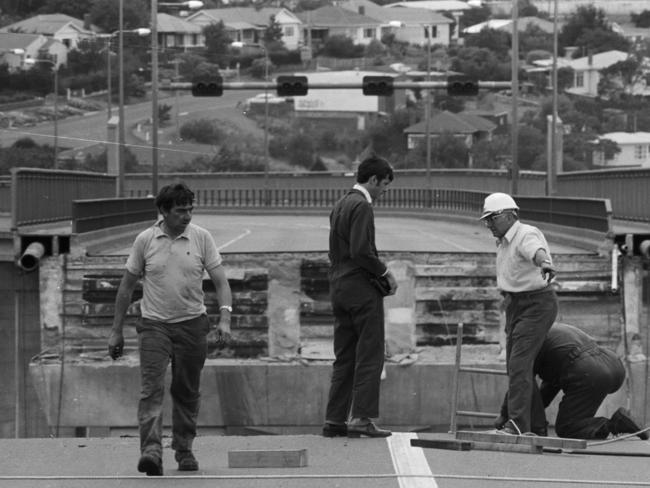
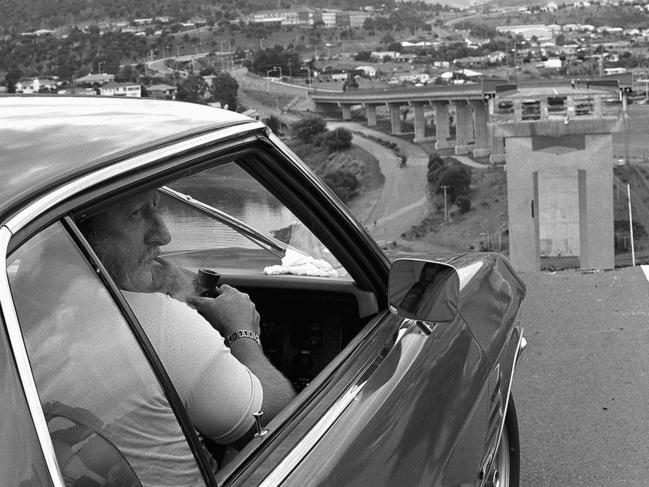
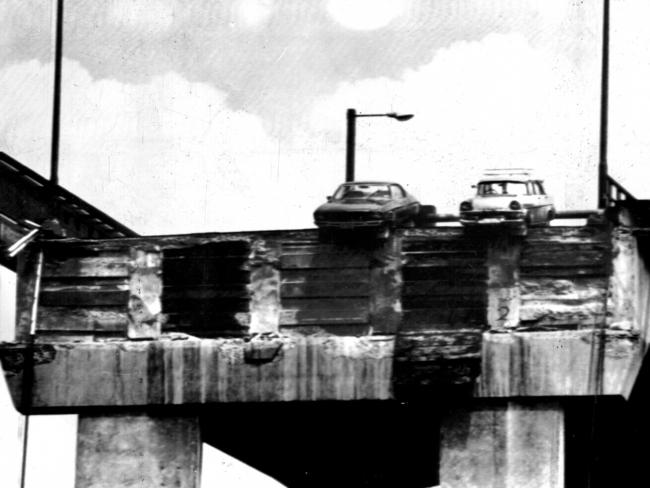
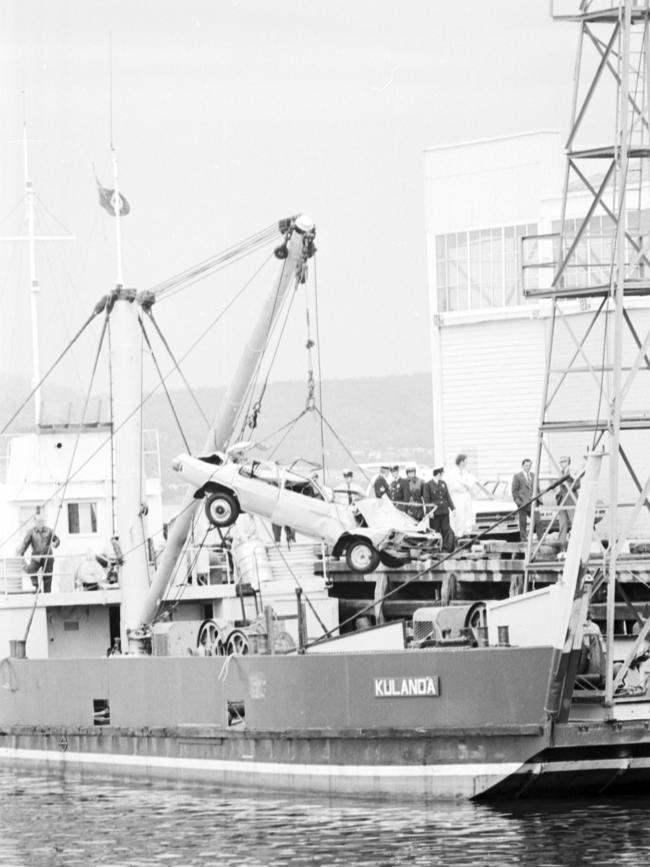
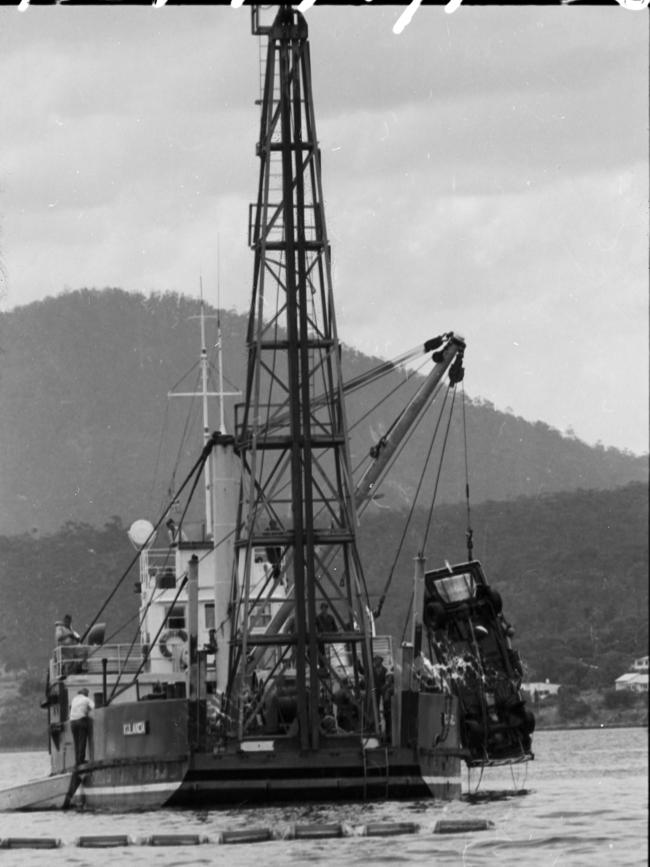
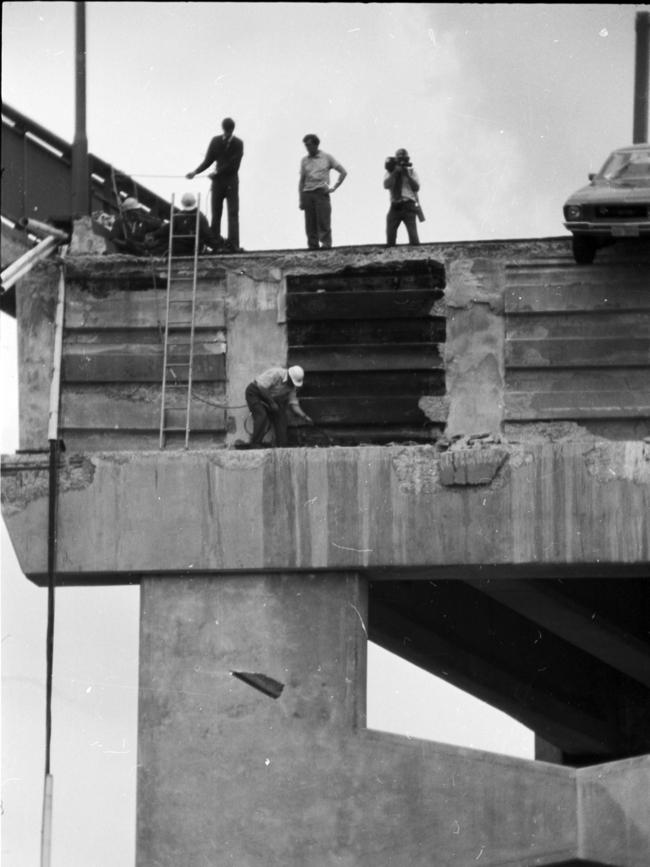
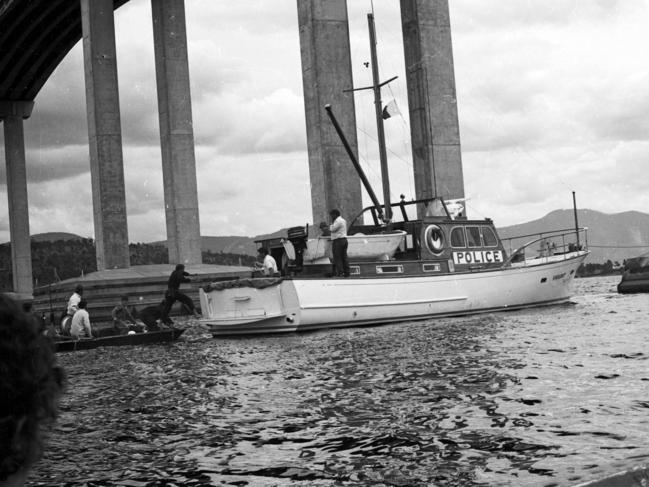
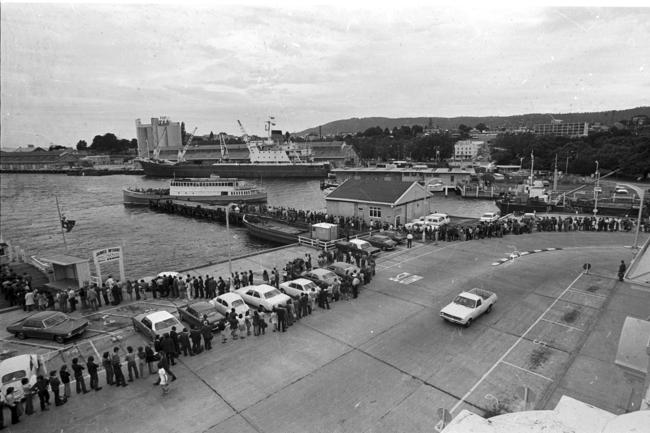
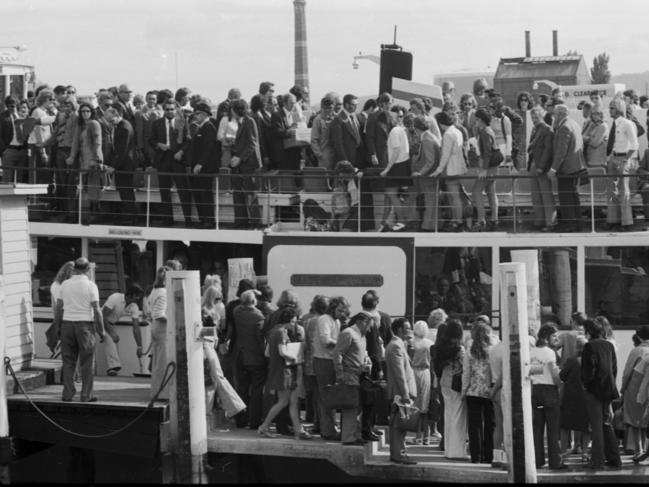
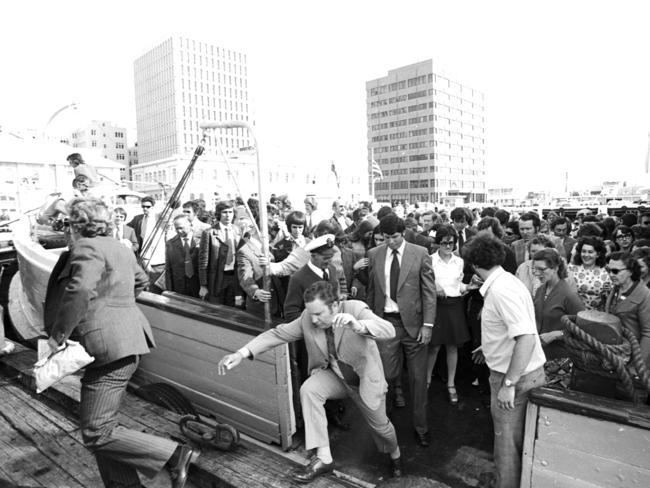
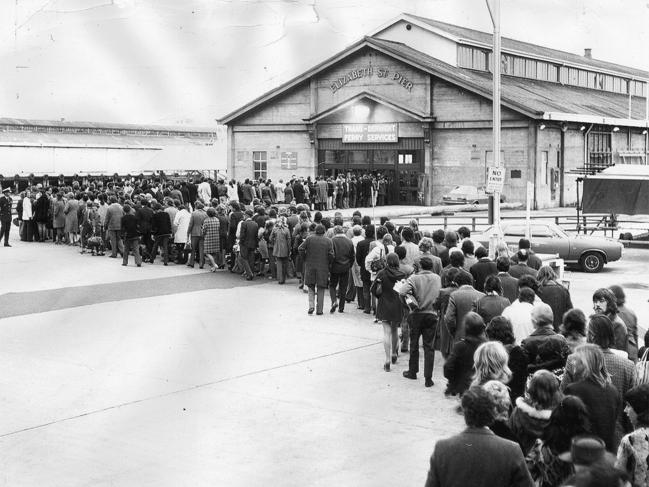
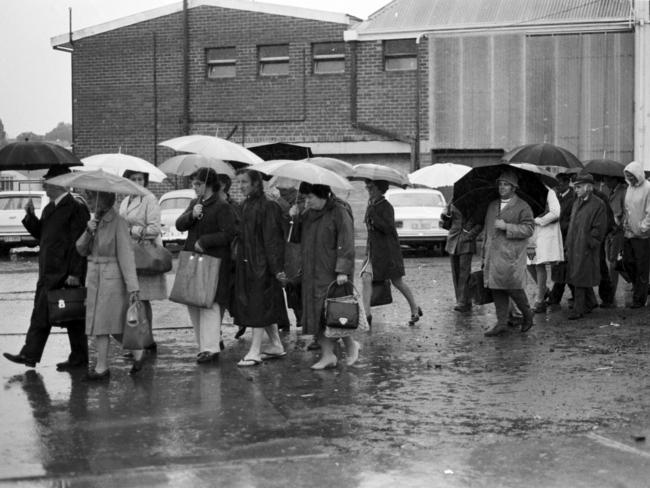
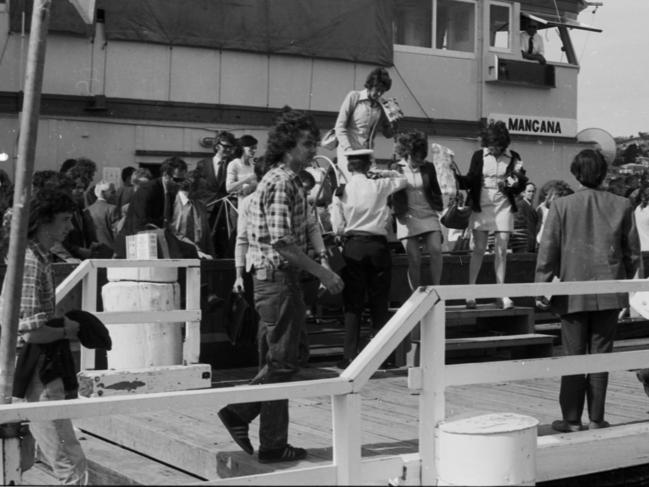
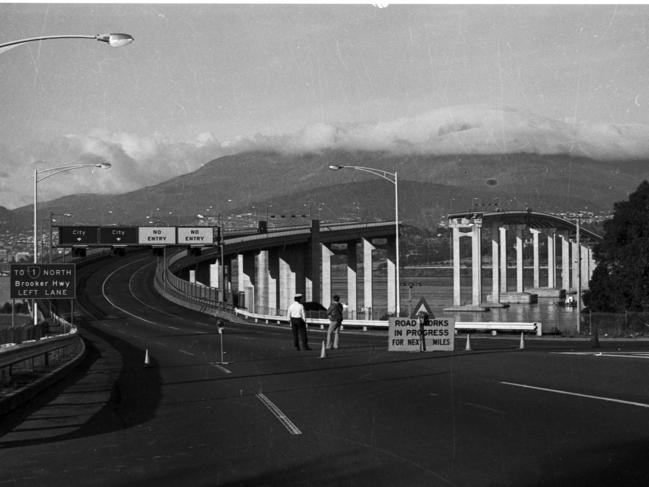
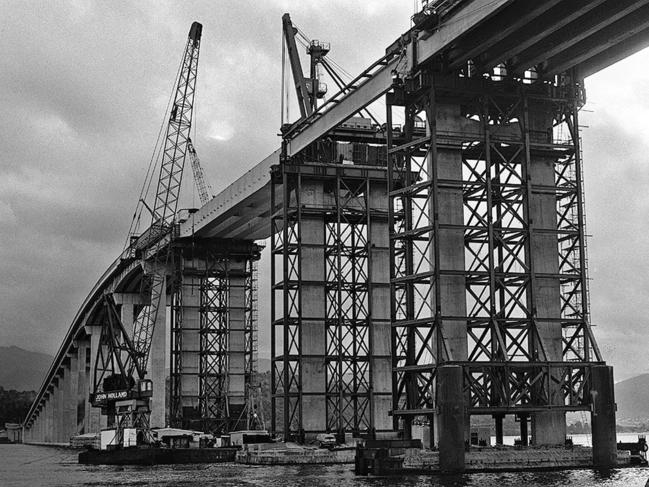
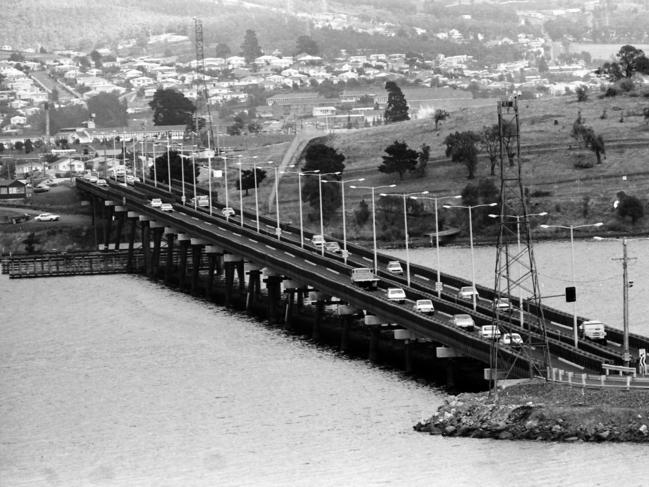
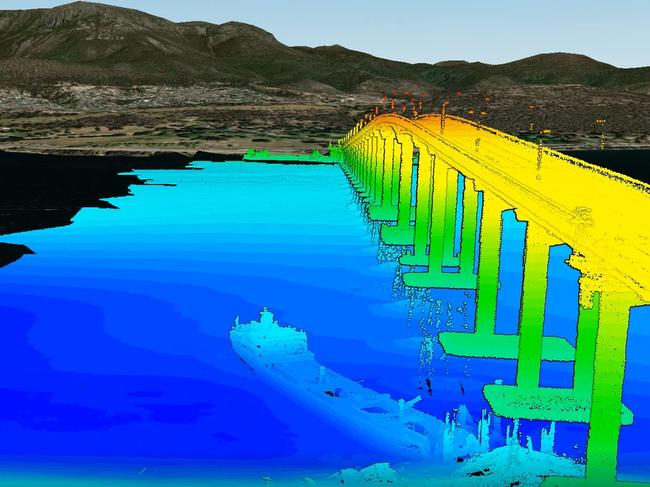
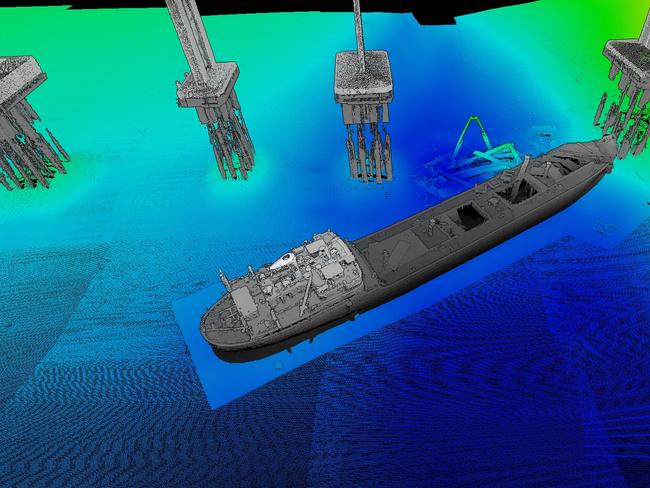
1/48Historical Accident Water Tasman Bridge Disaster January 1975 with cars on edge taken just after accident Picture Don Stephens Published 5th January 2000 Published History in Headlines 21st July 2004 Part 13
Tasman Bridge Disaster in pictures
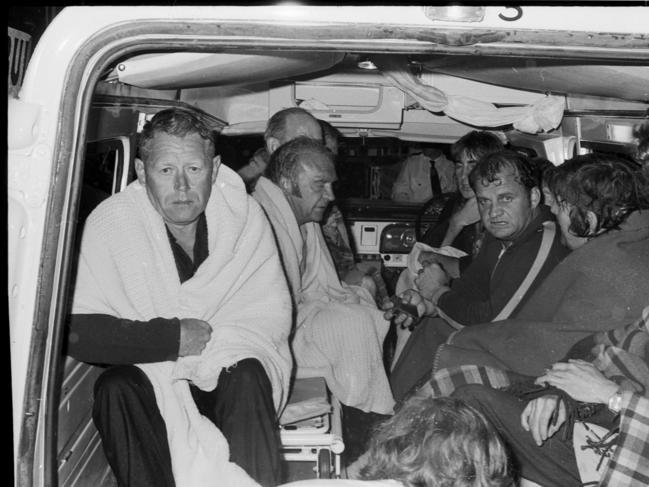
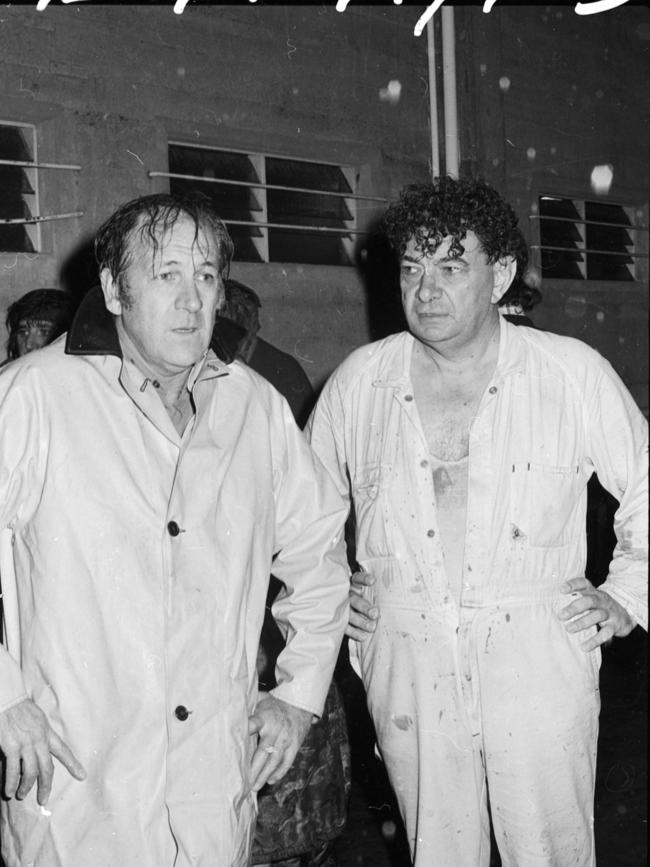
It was a calamity which shook the nation and changed Hobart forever. See the amazing images of the Tasman Bridge disaster
2/48Tasman Bridge disaster: Emergency workers attaching cables to the cars left on the edge of the Tasman Bridge after it was stuck by the Lake Illawarra bulk ore carrier on January 5, 1975. Negative number N4721-10 from the Mercury historical archive.
3/48Tasman Bridge disaster January 1975: Police and fire officers at the scene on January 5, 1975. Negative number N4765-3 from the Mercury historical archive.
4/48Tasman Bridge disaster January 1975: Tasmanian premier Eric Reece with police officers at the scene on January 5, 1975. Negative number N4765-1 from the Mercury historical archive.
5/48Also Published History in Headlines 21st July 2004 Part 13 Historical Accident Water Tasman Bridge Disaster 1975 cars hanging over the bridge 5th January 1975 Published 5th January 2000 Picture Barry Winburn, Negative N4740/4
6/48Tasman Bridge disaster: Crew members rescued from the sinking Lake Illawarra bulk ore carrier after it struck Hobart's Tasman Bridge on January 5, 1975. Pictured: survivors huddled in an ambulance. Negative number N4721-7 from the Mercury historical archive.
7/48Tasman Bridge disaster: Crew members rescued from the sinking Lake Illawarra bulk ore carrier after it struck Hobart's Tasman Bridge on January 5, 1975. Pictured: chief steward Ken Richards, left, and chief engineer Max Dalton. Negative number N4721-1 from the Mercury historical archive.
8/48Famous front pages from the Mercury. Tasman Bridge Disaster 1975.
9/48Tasman Bridge disaster: Lake Illawarra bulk ore carrier crew member Able Seaman Bernard Push, of Adelaide, in the Royal Hobart Hospital with nurses B. McGough and M. Rhee. Negative number N4756-1 from the Mercury historical archive.
10/48Historical Accident Water Tasman Bridge Disaster 1975 lights still blaze on the western end of the bridge Published 5th January 2000
11/48Historical Tasman Bridge Disaster 5th January 1975, the collapsed bridge as seen from the Eastern Shore with two cars hanging on the edge, Negative Number N4753/20
12/48Published Tasmania 200 Hobart Bicentenary Special Supplement 3rd March 2004 Historical Accident water Tasman Bridge Disaster January 1975 the two cars hanging over the edge of the bridge
13/48Tasman Bridge disaster January 1975: Retrieving the two cars from th edge of the damaged bridge. Frank Manley's Holden Monaro. Negative number N4770-19 from the Mercury hisorical archive
14/48Tasman Bridge disaster January 1975: Retrieving the two cars from th edge of the damaged bridge. Negative number N4770-21 from the Mercury hisorical archive
15/48Tasman Bridge disaster January 1975: Retrieving the two cars from th edge of the damaged bridge. Murray Ling watching the progress. Negative number N4770-15 from the Mercury hisorical archive
16/48Tasman Bridge disaster January 1975: Retrieving the two cars from th edge of the damaged bridge. Murray Ling with his Holden stationwagon. Negative number N4770-12 from the Mercury hisorical archive
17/48Tasman Bridge disaster January 1975: Damage to the bridge seen on January 6, 1975. Negative number N4753-41 from the Mercury historical archive.
18/48Published History in Headlines 21st July 2004 Part 13 Historical Accident Water Tasman Bridge Disaster 1975 Murray Ling moves the car next to his back from the brink Published 5th January 2000
19/48Tasman Bridge disaster January 1975: Retrieving the two cars from th edge of the damaged bridge. Murray Ling with his Holden stationwagon. Negative number N4770-4 from the Mercury hisorical archive
20/48Tasman Bridge disaster January 1975: Federal transport minister Charlie Jones and Tasmanian premier Eric Reece inspecting the scene on the Eastern Shore. Negative number N4785-2 from the Mercury historical archive.
21/48Tasman Bridge disaster: Royal Australian Navy divers assisted with the search for victims of the bridge disaster. Negative number N4815-9 from the Mercury historical archive.
22/48Tasman Bridge disaster: Royal Australian Navy divers assisted with the search for victims of the bridge disaster. Negative number N4755-15 from the Mercury historical archive.
23/48Tasman Bridge disaster: Royal Australian Navy divers assisted with the search for victims of the bridge disaster. Negative number N4755-11 from the Mercury historical archive.
24/48Holden Monaro (L) driven by Frank Manley & FB wagon driven by Murray Ling, hang over edge of Tasman Bridge after section collapsed when hit by ship Lake Illawarra on Hobart's Derwent River on 05/01/75. Pic News Limited Tasmania / Accident
25/48**This picture has a scanned reverse - see associated content at the bottom of the details window** Captain Boleslaw Pelc, master of the bulk ore carrier ship "Lake Illawarra" which crashed into Hobart's Tasman Bridge in 1975, causing it to collapse. 12 people died.
26/48Tasman Bridge disaster - the day after the collapse.
27/48Tasman Bridge disaster January 1975: Recovering the car of Robert Rezek, from the River Derwent. Negative number N4813-9 from the Mercury historical archive.
28/48Tasman Bridge disaster January 1975: Recovering the car of Mr and Mrs A. Sward, of Lindisfarne, from the River Derwent. Negative number N4771-1 from the Mercury historical archive.
29/48Tasman Bridge disaster January 1975: Retrieving the two cars from th edge of the damaged bridge. Negative number N4770-22 from the Mercury hisorical archive
30/48Tasman Bridge disaster January 1975: Damage to the bridge seen on January 6, 1975. Negative number N4753-14 from the Mercury historical archive.
31/48Tasman Bridge disaster January 1975: Ferries became essential for public transport following the bridge disaster. Ferry operator Bob Clifford talking to passengers on the Hobart waterfont. Negative number N48754-1 from the Mercury hisorical archive
32/48Historical Accident Water Tasman Bridge Disaster January 1975 with cars on edge taken just after accident Picture Don Stephens Published 5th January 2000 Published History in Headlines 21st July 2004 Part 13
33/48Tasman Bridge disaster January 1975: Ferries became essential for public transport following the bridge disaster. The queue on the Hobart waterfont. Negative number N48754-2 from the Mercury hisorical archive
34/48Tasman Bridge disaster January 1975: Ferries became essential for public transport following the bridge disaster. Negative number N4754-12 from the Mercury hisorical archive
35/48Tasman Bridge disaster January 1975: Ferries became essential for public transport following the bridge disaster. Arriving at the Hobart waterfont. Negative number N4754-7 from the Mercury hisorical archive
36/48Historical Ferry people line up for ferry during Tasman Bridge Disaster 1975 Published 5th January 2000 Published History in Headlines 21st July 2004 Part 13, Negative Number N6199/1
37/48Tasman Bridge disaster January 1975: Ferries became essential for public transport following the bridge disaster. Negative number N4800-7 from the Mercury hisorical archive
38/48Tasman Bridge disaster January 1975: Ferries became essential for public transport following the bridge disaster. Negative number N4754-21 from the Mercury hisorical archive
39/48Tasman Bridge disaster January 1975: Road closure on the eastern approach to the bridge, January 6, 1975. Negative number N4753-26 from the Mercury historical archive.
40/48Tasman Bridge disaster January 1975: Urgent upgrades were needed on Old Beach Rd to cope with massively increased traffic. Negative number N4806-8 from the Mercury historical archive.
41/48Tasman Bridge disaster January 1975: Urgent upgrades were needed on Old Beach Rd to cope with massively increased traffic. Negative number N4806-4 from the Mercury historical archive.
42/48Tasman Bridge disaster January 1975: Urgent upgrades were needed on Old Beach Rd to cope with massively increased traffic. Negative number N4806-6 from the Mercury historical archive.
43/48Tasman Bridge disaster January 1975: Urgent upgrades were needed on Old Beach Rd to cope with massively increased traffic. Negative number N4806-12 from the Mercury historical archive.
44/48Historical Tasman Bridge reconstruction Published 5th January 2000 25th anniversary of Disaster also published Tasmania 200 Hobart Bicentenary Special Supplement 3rd March 2004
45/48Historical Mercury Archives File Picture, April 1976, Bailey Bridge built over River Derwent following Tasman Bridge disaster. Negative number O941/3
46/48Twentieth (20th) anniversary of Tasman Bridge disaster where 05/01/75 ore carrier ship "Lake Illawarra" rammed pylon of bridge over Derwent River, Hobart killing 12 people, Frank & Sylvia Manley with Holden Monaro which was on bridge on night of disaster. General Tasmania / Accidents / Bridges
47/48A screen grab from a video flyover with the 3D modelling of the wreckage. Supplied: CSIRO
48/48A bathymetric map of the wrecked SS Lake Illawarra and Tasman Bridge pylons. Picture: CSIRO
Original URL: https://www.adelaidenow.com.au/news/tasmania/tasman-bridge-disaster-in-pictures/image-gallery/dc6db64af34ddbf2e60967f1707d2cd4